Tags: Payroll, create, receipt
Lesson ID-201.1
Updated to:
26/01/2026
Lesson objective
That the user can generate a payroll receipt quickly and easily, knowing in general the minimum requirements for its creation.
Create a payroll receipt
The issuance or generation of the payroll receipt is a process by which the employer prepares a digital file that contains the specific characteristics defined by the Tax Administration Service (SAT) and that, when certified by an Authorized Provider of Certification of digital tax receipts (PAC), becomes a legally valid document.
To generate the e-document, you must log into the system as indicated in lesson ID-101.1
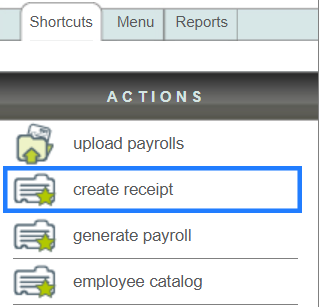
Once inside the system, enter the "Payroll" module.
Next, click on the "create receipt" button located in the "Actions" menu.
The form where you must enter the payroll receipt information will then appear. In this lesson, we will cover each section of this form in general terms to show you how to quickly and easily create the receipt.
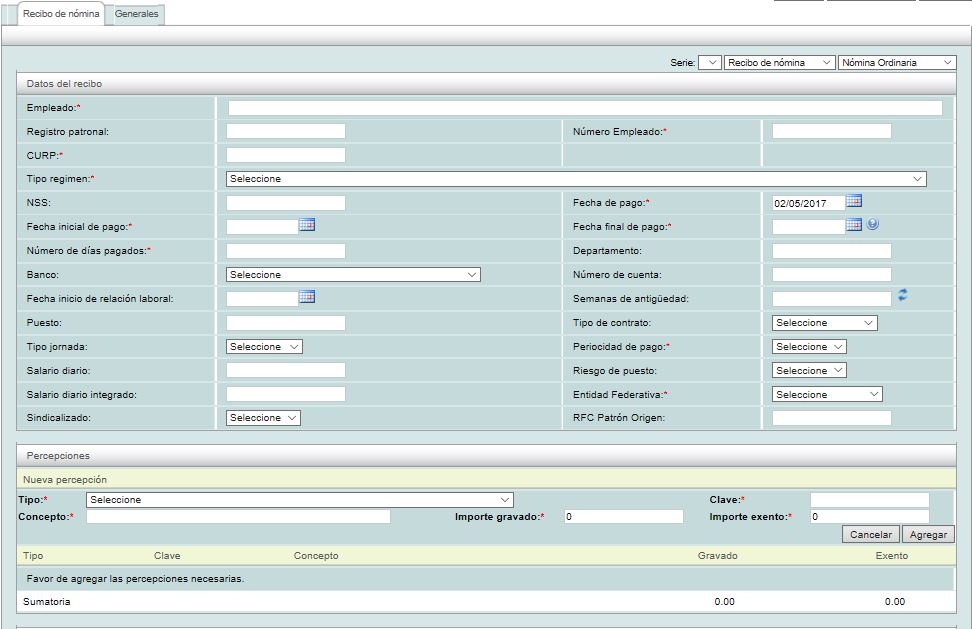

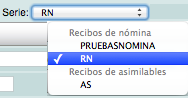
Receipt series
Select the "Serie" you wish to use for the receipt; normally the assigned series will be "RN" and its tax effect will be "Egreso". If you have any questions regarding this topic, please refer to lesson ID-103.1
Employee "Receptor"
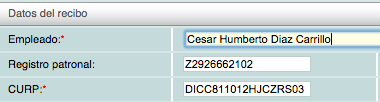
Ingrese el nombre del empleado receptor del recibo, al ir ingresando los datos se mostrará una
lista con los datos pre-cargados en la base de datos.
If you have not yet registered the employee, refer to lesson ID-202.1
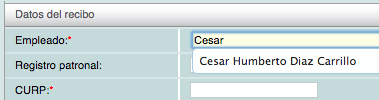
When you select the employee, the system will fill in all the information.
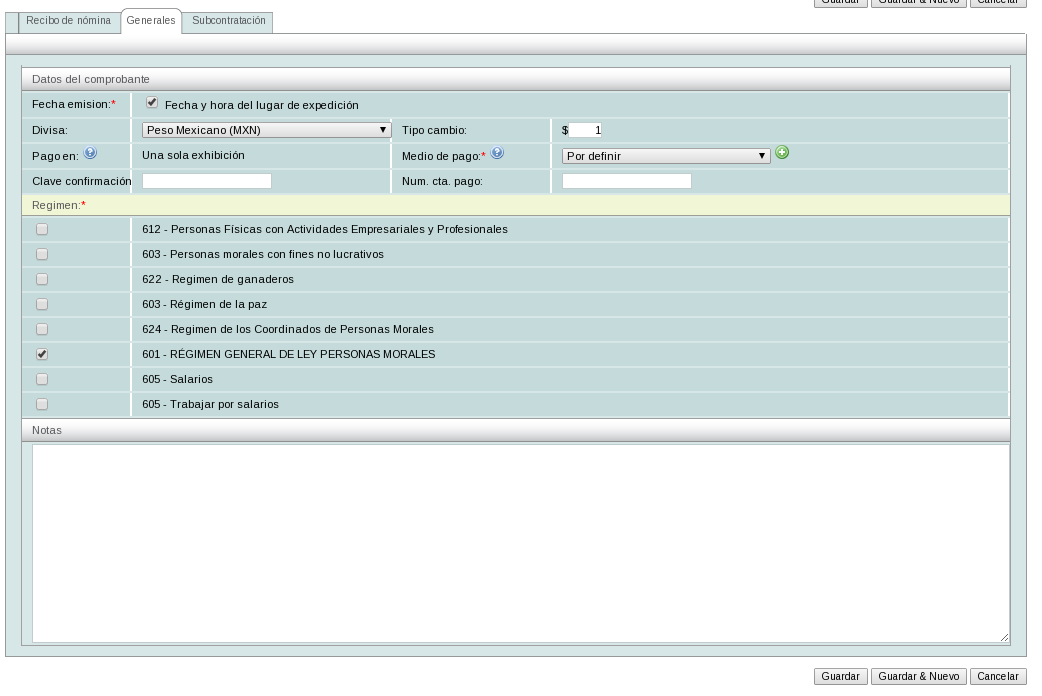
General section
The general data of the receipt is configured, which includes:
- Fecha emisión: if this option is selected, the issue date is calculated based on the receipt series; otherwise, it will be the one assigned by the user.
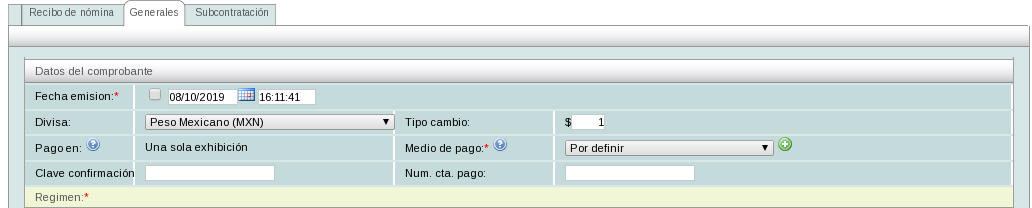
- Divisa: The currency in which the receipt is generated.
- Tipo de cambio": The exchange rate for the receipt.
- Pago en: Default value "Una sola exhibición" (Single payment).
- Medio de pago: Payment method used to generate the receipt.
- Regimén: Specify the tax regime code of the issuing taxpayer under which the receipt is being issued.
- Nota: Note to be added when generating the receipt.
Payment dates
You will need to specify the payment dates for the receipt. First, enter the "Fecha inicial de pago" followed by the "Fecha final de pago". You can use the small calendar located to the right of each date to select the day. Then, enter the "Fecha de pago" and the "Número de días pagados".

Percepciones
Next, you must enter the deductions you want for the payroll receipt in question. To add them, click on the "Tipo" button and select the deduction. Then, enter the taxable and/or exempt amounts as appropriate, and finally add the "clave" for the deduction according to your company's catalog. Once all the information has been added, click on the "Agregar" button.
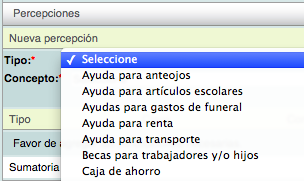
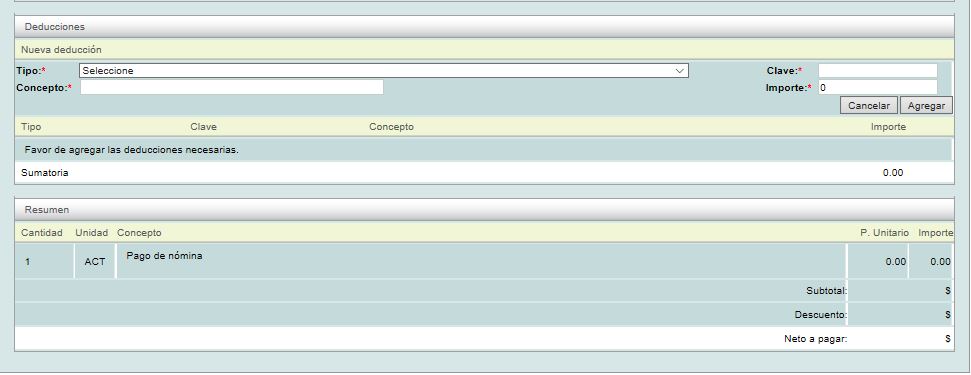
By clicking the "Agregar" button, the information will be displayed at the bottom of the screen. If you wish to add more perceptions, follow the process described above.

The summary of the added perceptions will be shown below. If you wish to remove any perception from this list, simply click on the icon.


Deducciones
Just like with the earnings, you must enter the deductions you want for the receipt. To add them, click on the "Tipo" button and select the deduction. Then enter the taxable and/or exempt amounts as appropriate, and finally add the deduction "clave" according to your company's catalog. Once all the information has been added, click on the "Agregar" button.
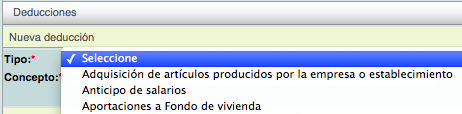
By clicking the "Agregar" button, the information will be displayed at the bottom of the screen. If you wish to add more perceptions, follow the process described above.

The summary of added deductions will be displayed below. If you wish to remove any deduction from this list, simply click on the icon.

At the end of the form you will find a summary of the receipt amounts; please verify that the amounts are correct.

Save the receipt
When finished, click on the "Guardar" button located at the bottom of the screen. It is important to make sure that the information entered is correct, as once the receipt has been generated it can no longer be edited.

Please confirm that the information is correct by clicking the "Aceptar" button.
Once saved, you will be able to view the information and perform various actions with the generated receipt.
To download your electronic receipt and/or send it to your client, refer to lesson ID-103.4
