Index | Lesson index | Lesson ID-107.3 -- Create a CFDI with payment complement for a partial payment
Tags: Payments, CFDI, 4.0, payment complement, partiality
Lesson ID-107.3
Updated to:
13/02/2026
Lesson objective
That the user knows how to create an e-document with the partial payment complement in the Payments module.
Create a CFDI with payment complement for a partial payment
To perform this action, you must first log into the system as indicated in lesson ID-101.1
Click on the "Payments" tab.

In the "Actions" menu on the left side of the screen, click on the "crear pago manual" option.

In "Serie", select the series you previously configured for the payment receipt. If you haven't configured one, see how to do so in lesson ID-106.5.2. Then select the recipient.
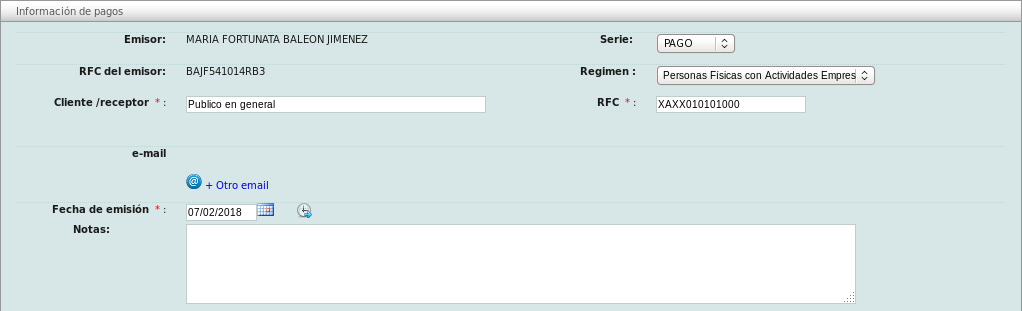
In the "Datos Generales de Pago" section, you must specify the currency, payment method, and amount. The amount will be the total of the e-document and must be greater than or equal to the sum of the "Importe Pagado" for each document you need to link. In this example, it will be $2,000.

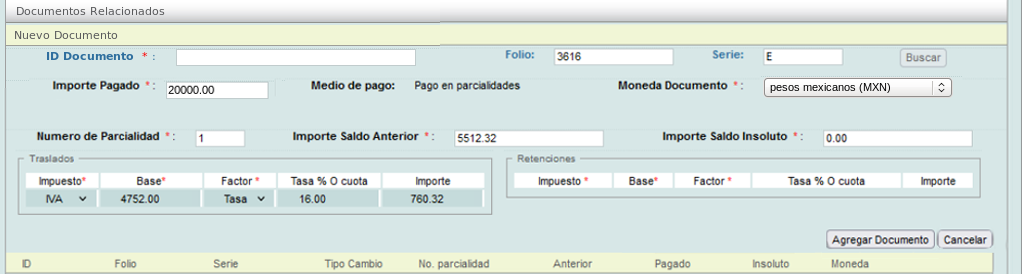
In the "Documentos Relacionados" section:
- We recommend searching by series and folio number, as this will allow the system to automatically fill in most of the required information.
- "Importe Pagado": this must be less than or equal to the total "Monto"of the e-document.
- If this is the first installment, enter "1." For subsequent installments, the system will automatically record the number of installments.
- "Importe de Saldo Anterior": this is the remaining balance due. If this is the first installment, it should be the total balance of this document. Therefore, for subsequent installments, this value will be lower.
- "Importe Saldo Insoluto": this is the difference between the previous balance and the payment amount.
When you are ready to add this document, click the "Agregar Documento" button.
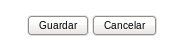
The receipt(s) related to this e-document will be displayed; you can add as many as you need, as long as they are from the same customer.

Once you have completed this process, click on the "Guardar" button.
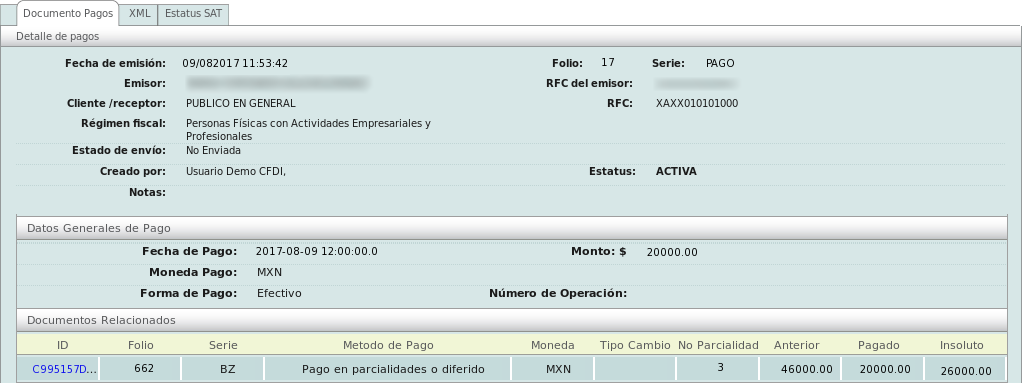
Information regarding the payment receipt will be displayed, and the "ID" of the related document will take you to the receipt if you click on it.
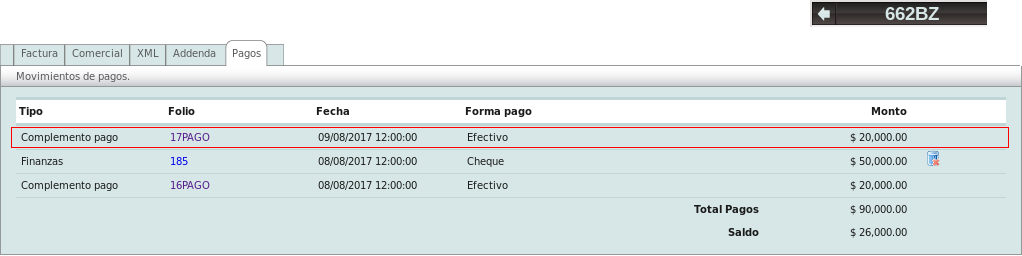
After clicking on the link that takes you to the related e-document, you can go to the "Payments" tab to view the payment receipts issued for this invoice, ordered from the most recent to the oldest.