Tags: Logo, format, Invoicing
Lesson ID-109.1
Updated to
26/02/2026
Lesson objective
The user should know how to set their logo in the system so they can use it for the invoicing format.
Establish a logo for the invoicing format
To perform this action, you must first log into the system as indicated in lesson ID-101.1
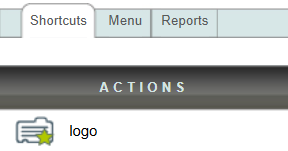
From the black menu options at the top of the screen, click on the "Preferences" option.
In the "Actions" menu, click on the "logo" option.
Click on the "Browse..." button in the window that will appear and choose the image.

Please remember that when uploading your image, you should upload it exactly as it will appear in the final format. We suggest using the ".png" or ".jpg" file type, with a size no larger than 300 x 300 pixels and a file size no larger than 200 KB. Avoid leaving any unnecessary spaces. This will ensure the generated file has a small storage size and that your logo doesn't take up too much space.
| Suitable (300 x 115 pixels, 16.9Kbytes) | Inadequate (800 x 307 pixels, 20.3Kbytes) |
|---|---|
 |
 |
You will see the logo appear in the window; click the "Guardar" button.
Click on the "descargar pdf" option in the "Actions" menu and immediately click on the "CFDI_impreso_logo" report.
